• The Galaxy Note 8

    Are you a fan of iPad Mini, then you just got your closest competitor in the 8 inch tablet market - the Galaxy Note 8; regards uncle sammy ...

  • ICS 4 firmware build ZSLPF on Galaxy Note

    There is a leaked Ice Cream Sandwich version available for Galaxy Note GT-N7000; Today I'll show you how to install that ICS 4 firmware build ZSLPF on your Phablet ...

  • Root Samsung Galaxy S2 I727R LTE

    Have you ever thought your favorite Samsung Galaxy S2 I727R LTE could play for you some extra features if you got it rooted ? Some of you might think its a rather complex job to achieve ...

Thursday 28 June 2012

Stable CyanogenMOD 7.2 compatible Device List

cyanogen MOD


Those who are tired using the same old Android Gingerbread on your Android Gadgets, might want to have a taste of CyanogenMOD 7.2. It is very stable MOD. Better than the stock ROM and a better feeling of the interface with this custom MOD. As you might know, CyanogenMOD is the best custom MOD other than the official ROMs you'll find. Also, many of you would be running old version of Android Gingerbread. Cyanogenmod 7.2 is based on the latest Gingerbread version 2.3.7.

You can download the Custom MODs using This Link.


Here is the list of devices that will support CyanogenMOD 7.2.


Barnes&Noble

  • NOOK Color (encore)

HTC

  • Hero CDMA
  • myTouch 4G (glacier)
  • myTouch 3G Slide (espresso)
  • Desire (bravo)
  • Desire HD
  • Tattoo (click)
  • Wildfire (buzz)
  • Incredible (inc)
  • Incredible 2 (vivow)
  • Droid Eris (desirec)

LG

  • myTouch T 4G (e739)
  • Optimus Sol (e730)
  • Optimus Hub (e510)
  • Optimus Pro (c660)

Motorola

  • Droid 2 (Global)


Samsung

  • Galaxy S (galaxy smtd/sbmtd)
  • Galaxy SII (AT&T and international)
  • Fascinate
  • Nexus S/4G (Crespo/4G)
  • Galaxy Ace

Sony Ericsson

  • Xperia Pro MK16 (iyokan)
  • Xperia Neo (Hallon)
  • Live w/ Walkman (coconut)
  • Xperia Arc (Anzu)
  • Xperia Ray (urushi)
  • Xperia Play (zeus)
  • Xperia Mini/Pro (smultron/mango)

ZTE

  • Blade

New Temple Run Brave for Androids


One of the most exciting and widely played & enjoyed Android Game is obviously the Temple Run. Now a newer Version of this Game is available for Gamers; its Temple Run Brave.

From Imangi, the makers of Temple Run, and Disney comes a new take on the most exhilarating app. Join Merida from Disney/Pixar Brave as you run, slide, jump, turn and shoot your way across the wilds of Scotland on an endless running adventure!

Some exciting new features of Temple Run Brave are :

  • Introducing ARCHERY – tap targets to shoot a bullseye and earn extra coins
  • New, amazing visuals. It looks better than ever!
  • All new environments inspired by Disney/Pixar Brave and the wilds of Scotland
  • Play as Merida from Disney/Pixar Brave
  • Outrun Mordu, the demon bear, to earn running glory

Now you can download Temple Run Brave and start running with $.99 worth of coins for FREE, that’s 2500 coins for power-ups and more!

Here is the download Link for Temple Run Brave from Google Play Stores.

Also this version includes all the great features from Temple Run :

  • Simple swipe and tilt control that are easy to use and just feel right
  • Level up your character and use crazy power-ups
  • Endless play!
Here is the official Trailer of Temple Run Brave.


Wednesday 27 June 2012

ICS (Ice Cream Sandwich) update for T-Mobile Samsung Galaxy S2

samsung Galaxy s2


If you are using T-mobile Samsung Galaxy S2, you can now have Android Ice Cream Sandwich running on your Gadget easily. Currently you can install the update using the latest version of Kies, installed on your PC. The detailed guide and version information can be found HERE.

There are few improvements on this updated Android version. They are :

  • CMAS improvement
  • Wi-Fi Calling enhancements
  • Voicemail enhancements
Make sure to make a complete Backup of your system before proceeding. Read our guide on How to take a good Back up of all Data on your Phone.

Good-Luck !

Sony's New Xperia Smartphones - Xperia Miro,Xperia Tipo & Tipo Dual,Xperia ION HSPA


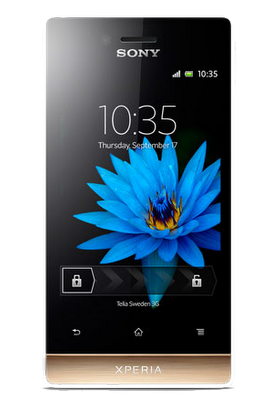
Recently Sony has concentrated a lot in its new Xperia series. Be it the quality or the design, the new Xperia smart-phones are outstanding in their respective class. Now to add to this competitive market, Sony has freshly queued 4 smart-phones namely- Xperia Miro, Xperia Tipo & Tipo Dual, Xperia Ion HSPA. It seems they want to take a hand on with the other smart-phone manufacturer, especially Samsung. Samsung is doing a great job recently. They have touched record heights regarding the smart-phone sales. But it's true Sony has always been on the market with quality products. May be now it's time for Sony to take hold what's going on in the market. The new Xperia series is quite powerful, trendy as well as budget friendly. According to News these 4 new smart-phones by Sony will be released  approximately on Q3 this year. The Xperia series has a great advantage over other smart-phones in the market; which is of-course its design, form-factor and style. Sony's engineers have always taken care of that. Let's see what are the specifications of these new Xperia breed. 


Sony Xperia Miro

Sony Xperia Miro


Xperia Miro is a slim, stylish smart-phone with Facebook social experiences integrated throughout. Users are alerted to new incoming messages and social updates with colourful illuminations, and can easily video chat with friends using the front facing camera. To provide great music entertainment, it integrates Sony’s xLOUD audio technology, giving crisp and loud sound.


Color Availability :


 black, black/pink, white and white/gold


Xperia Miro Specification :


  • 800 MHz Qualcomm MSM7225A processor
  • UMTS HSPA 900 (Band VIII), 2100 (Band I), and GSM GPRS/EDGE 850, 900, 1800, 1900
  • 3.5” display, anti-reflection coating on mineral glass
  • Display Resolution 320×480 pixels
  • 4 GB (up to 2.2 GB user-accessible memory) internal phone storage
  • 512 MB RAM
  • Memory card slot: microSD, up to 32GB
  • 1500 maH battery.
  • 113 x 59.4 x 9.9 mm, 110 grams
  • 5 MP camera resolution, 4x digital zoom, LED photo flash
  • VGA video recording
  • Front facing VGA camera
  • Accelerometer, Proximity sensor, Magnetometer, Bluetooth, aGPS
  • DLNA Certified xLOUD sound experience
  • Launching on Android 4.0 (Ice Cream Sandwich)
  • PlayNow service, TrackID music recognition
  • Facebook integration with contacts, gallery and the music player
  • Sony Entertainment Network


Sony Xperia Tipo / Tipo Dual

Sony Xperia Tipo


Xperia Tipo offers a simple and easy to use smart-phone experience targeting consumers who may be purchasing their first smartphone. With a built-in application enabling users to monitor their data usage, excellent battery life and the latest Android platform – Ice Cream Sandwich – consumers can make the most of their smartphone experience. And if you have several phone subscriptions and need to use two sim cards at the same time, Xperia Tipo Dual will be your obvious choice!

Color Availability :


red, white, blue and black


Xperia Tipo Specification :


  • 800 MHz Qualcomm MSM7225A processor
  • UMTS HSPA 900 (Band VIII), 2100 (Band I), and GSM GPRS/EDGE 850, 900, 1800, 1900
  • 3.2” display (measured diagonally), shatter proof sheet on acrylic glass
  • Display resolution 320×480 pixels
  • 2.9 GB (up to 2.5 GB user-accessible memory) internal phone storage
  • 512 MB RAM
  • Memory card slot: microSD™, up to 32GB
  • Dual SIM (on Xperia Tipo Dual)
  • 1500 maH battery
  • 103x 57×13 mm, 99.4 grams
  • 3.2 MP camera resolution, 4x digital zoom.
  • VGA video recording
  • Accelerometer, Proximity sensor, Bluetooth, aGPS, xLOUD sound experience
  • Launching on Android 4.0 (Ice Cream Sandwich)
  • PlayNow service, TrackID™ music recognition, Sony Entertainment Network
  • Facebook integration with contacts, gallery and the music player


Sony Xperia Ion HSPA

Sony Xperia Ion HSPA


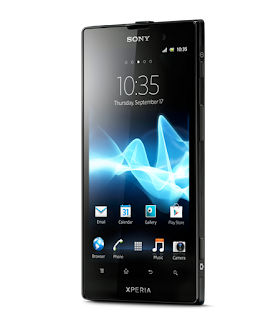
The Xperia Ion HSPA is the 3G version of the original LTE Xperia Ion headed to AT&T in the US.The phone has been introduced for countries which do not have 4G networks. The Xperia Ion will come with a 4.6 inch screen and a resolution of 1280 x 720. It will also feature a 1.5GHz dual core processor and Gingerbread. Sony promised that they will update the phone to Ice Cream Sandwich in the coming months.


Xperia Tipo Specification :

  • 4.6″ display (Resolution:1280 x 720)
  • Android 2.3,planned upgrade to ICS
  • 1.5GHz dual-core CPU
  • 12MP rear camera with 1080p video
  • 1.3MP Front facing camera
  • 1900 mAh battery

For More information:


Sunday 24 June 2012

Quick Voice - LG's New Voice Assistant Technology

Quick Voice


Recently LG has launched its own voice Assistant Technology, which is quite an intelligent voice recognition service similar to Apple's Siri and Samsung's S-voice, featured in Galaxy S3. It is of no-doubt that each and every smartphone manufacturer is trying not to give their competitor an edge regarding technological improvement.

Using Quick Voice users will be able to compose messages, call numbers, schedule appointments and launch apps. Even, the Korean version of Quick Voice will be able to check lunar calender dates.

It is expected that by July, the Optimus series of LG smart-phones will get the taste of Quick Voice.


WinZip now available for Android Devices on Google Play Store

winzip for Android


Now you can download the Android compatible WinZip from Google Play Stores. It works same as it does on our PC. With Winzip, you can extract .zip or .rar files easily on your Android Gadget. You no longer need a PC to rely on while you download a mail attachment which is either on .zip or .rar format.


The WinZip app is compatible on Android v2.1 and higher versions. Here are the list of files that WinZip currently supports:

  • Photos and images (.jpg, .jpeg, .png, .bmp, .gif)
  • Text files (.rtf, .csv, .txt, .ini, .inf, .bat, .js, .log, .xml, .css, .java, .cs, .h, .m, .cpp, .c, .sql, .properties)
  • Web files (.htm, .html, .jsp, .asp)
  • Apk files (.apk)
  • WinZip for Android works with 3rd-party apps to open:
  1. Word documents (.doc, .docx)
  2. Excel spreadsheets (.xls, .xlsx)
  3. PowerPoint presentations (.ppt, .pptx)
  4. PDF files (.pdf)

Here is the Download Link for WinZip App from the Google Play Stores.


Latest Android Ice Cream Sandwich 4.0 Update for Sony Tablet S

Sony Tablet S


Finally Ice Cream Sandwich 4.0 update is available to Sony Tablet S. The next time you connect to Wi-Fi, your Sony Tablet S should prompt you to do a system update – just click OK to download, and in a few minutes you should be ready to go on Android 4.0.

There is a bunch of cool new features added to this ICS firmware upgrade, such as:


  • Enhanced lock screen
  • Direct access to Notifications
  • Unlock direct to camera
  • New panoramic camera mode
  • Enhanced Gallery media viewer
  • Direct SD card access + photo editing tools
  • Exclusive “Small Apps’ for multi-tasking
  • Calculator, Browser, Remote Control
  • Move to screen edge for reduced clutter
  • New Home Screen actions
  • Drag icons together to create folders
  • Add names to folders
  • Enhanced web browser
  • Switch from mobile to desktop web sites
  • Save pages for offline viewing
  • Access files directly from SD card
  • Native screenshot capture
  • Press “power” and “Volume –“


Checkout the video below to see the Sony Tablet S running Ice Cream Sandwich 4.0.


Latest Android Ice Cream Sandwich 4.0 Update for Sony XPeria S

Sony Xperia S


Good News for all those who are using Sony Xperia S ! As Sony has officially started rolling out Ice Cream Sandwich 4.0 update for Xperia S along with unique media apps like, Walkman, Album and Movies.

Checkout the video below to see what is new in this ICS 4.0 upgrade.


The ICS 4.0 update has brought a lot of cool features that promises to deliver improved User Experience. Some of the enhancements are listed below:

  • Lock screen with improved functionality
  • Re-sizable widgets (improved personalization)
  • Improved control of your mobile data consumption
  • Recent Apps button for clear overview of your applications


The update will be directly accessible from the phone over mobile networks and WiFi; and also there is an option of upgrading using a computer – either with web-based Xperia Update, PC Companion or Bridge for Mac.

Checkout the video below which shows a step by step procedure for installing the update.


HTC to halt all phone sales in Brazil

HTC logo


Recently a HTC executive from Brazil told AndroidPIT that "after analyzing the sales numbers, we have decided to pull out of the Brazilian market". Even-though they will be providing customer support to existing customers.

It seems that HTC's market share in the country is dropping gradually. Also, HTC is facing tough competition with Samsung, Motorola and Nokia. Brazil is 7th largest economy in the world and Brazil has over 27 million phone subscribers. So it seems very unfortunate for HTC to have to cancel their planned One series launch for the country.

Brazilian Government policy towards this Cell-Phone manufacturer company was not soothing too in terms of taxes. The price of HTC products therefore never was quite market-friendly. 

It's time for HTC to innovate some new features, which might be quite a big deal for their Market Share globally.

Saturday 23 June 2012

Send SMS from your Computer/Tablet and still use your own Phone Number- Mighty Text


Have you ever been in such a situation when you forget your phone at work or home and can't get your phone right-away ? Well, don't worry, I do have a solution for you by which you will be easily able to use your computer or tablet to send and receive text messages, that are normally handled by your phone; not only that, you'll also be able to screen incoming calls by seeing the caller information on the computer. Is n't that cool !


Requirements


  • A Google account
  • Mighty Text App for your Android Phone
  • Depending upon the browser you use on your computer, you need to download the browser extensions from below links :
  1. Chrome Extension
  2. Firefox Extension


Step by Step Instructions

  • Firstly, install Mighty Text App on your Android Device.
  • Now run the App and select the Google Account you want to associate. The Google Account is used for syncing access from the phone to the computer.
  • You have to grant permission for the App.
  • Depending upon the browser you use, install the Browser Extension. Get the download links from Requirements area of this post.
  • In case, you are using MAC, you need to install the Growl Notifications.


Mighty Text User Interface


That's it ! Enjoy the pleasure of messaging right from you PC. If you are using the Separate App of Might Text i.e. the Web Interface other than your browser, you would get the taste of a few additional features. You will be able to to sync your Google contacts so the names will pop up automatically and also you can send MMS.


Thursday 21 June 2012

Install CyanogenMod 9 nightly builds on Galaxy S3


World is still in fever with the amazingly cool and powerful Samsung Galaxy S3 and we have already the CyanogenMod 9 nightly builds for S3 to try out. Cyanogenmod 9 adds extra features such as an audio equalizer theme support and most importantly Cyanogen Mod is a free, community built, aftermarket firmware distribution of Android 4.0 (ICS), which is designed to increase performance and reliability over stock Android for your device.


Although CyanogenMod 9 nightly builds on Galaxy S3 implies some limitations because this Mod is still to undergo some more stages of development. The known issues are:


  • FM Radio: currently not supported, try Spirit FM from market.
  • Camera: using LED flash causes FCs on some phones.
  • Wakening the device up using volume keys might not work because the device is sleeping to deep and doesn't recognize key presses.


However, CyanogenMod 9 nightly is worth a try because of its bunch of added features & cool looks. Follow the images below.


So, are you convinced so far to try the flash CyanogenMod 9 nightly builds on Galaxy S3 ?

If your answer is "Not yet !", then why don't you follow the detailed instructions on How to flash the CyanogenMod 9 nightly builds on Galaxy S3 from the XDA Developers' Thread.

Good-Luck !


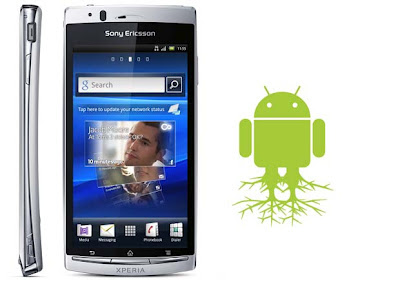
How to Root Sony-Ericsson Xperia Arc S On Official Ice Cream Sandwich Firmware

Xperia Arc S


Today I'll show how you to root the Xperia Arc S on latest Android Ice Cream Sandwich firmware. Rooting will improve your user experience as you would be the super-user and would be able to overclock the device; not only that, you would be able to uninstall/freeze manufacturer/carrier bloatware, install custom ROM’s like Cyanogen Mod, MIUI etc. Follow the instructions precisely to root your Sony-Ericsson Xperia Arc S.

Things to know First

  • The instructions provided here are only for Sony-Ericsson Xperia Arc S.
  • This tutorial will root your Xperia Arc S on official ICS firmware.
  • We are not at all responsible for any damages caused to you or your Gadget while you follow our instructions.
  • Rooting will void the warranty of your phone.

Requirements

  • A computer running windows.
  • Backup all your Phone Data. Read our guide on how to take a complete backup of Android Gadgets.
  • Enable USB debugging on your phone by going to "Settings > Applications > Development > USB debugging". Make sure the USB Debugging option is ticked. 
  • At-least 70% of Battery juice (charge !) remaining.
  • Make sure that USB drivers of Xperia Arc S are installed on your PC.


Step by Step Instructions

  • Firstly, you have to download the Xperia Arc S rooting package from here.
  • Now, extract the contents of the downloaded package. Make sure you have the following :
  1. A folder labelled files.
  2. A batch file labelled "runme.bat".
  • Now connect your phone to PC.
  • Now double click on "runme.bat" and wait for the rooting process to complete. 
  • Reboot your phone after the rooting process completes. 


Voila ! You have successfully rooted your Sony-Ericsson Xperia Arc S On Official Ice Cream Sandwich Firmware. Enjoy the rooted ICS firmware with the bunch of cool features.


Good-Luck !


How To Root HTC One V

HTC One V


Today, I 'll share how to Root the HTC One V easily. Rooting will improve your user experience as you would be the super-user and would be able to overclock the device; not only that, you would be able to uninstall/freeze manufacturer/carrier bloatware, install custom ROM’s like Cyanogen Mod, MIUI etc. Follow the instructions precisely to root your HTC One V.


Things to know First

  • The instructions provided here are only for HTC One V.
  • We are not at all responsible for any damages caused to you or your Gadget while you follow our instructions.
  • Rooting will void the warranty of your phone.

Requirements

  • Backup all your Phone Data. Read our guide on how to take a complete backup of Android Gadgets.
  • Enable USB debugging on your phone by going to "Settings > Applications > Development > USB debugging". Make sure the USB Debugging option is ticked. 
  • At-least 70% of Battery juice (charge !) remaining.
  • You need to unlock your phone’s bootloader from htcdev.com.

Step by Step Instructions


1. First you need to download the HTC One V rooting package from HERE

2. Now save the zip in a folder in your PC. Extract the downloaded zip files using any decompressing software. After the extraction make sure that you have these following files :


3. Now,download the modded boot.superboot.img file from HERE

4. Now replace the original boot.superboot.img present in the file you extracted in step 2 with the modded boot.superboot.img file you downloaded in step 3. 

5. Switch-off your phone. 
6. Now switch on your phone by holding power + volume down buttons. 

7. Now select Fastboot with the help of your volume rocker and press the power button.

8. Finally, connect your phone to PC and double click on “install-superboot-windows.bat“. This should take some time.


Voila ! You have successfully rooted your HTC One V. Enjoy your gadget as a super user.

Good-Luck !


Tuesday 19 June 2012

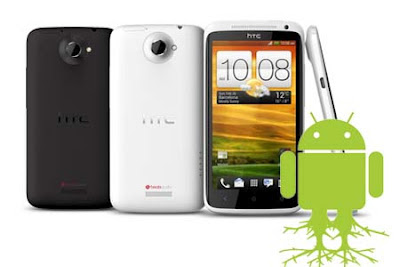
How To Root AT&T HTC One X - One Click Root !

HTC One X

The AT&T HTC One X is another amazing HTC product with ICS 4 powered by dual-core 1.5 GHz SnapDragon S4 processor. Be it the cool crisp 4.7 inch display, 1 GB RAM or the 8 MP Camera - the Gadget is full of elegance & smartness. Well, the device would work a bit more smooth if you be the superuser of OS. Yes, I'm talking about rooting the HTC One X.

Today I 'll share, how to root AT&T HTC One X with One Click.


Things to know First


  • The instructions provided here are only for AT&T HTC One X.
  • We are not at all responsible for any damages caused to you or your Gadget while you follow our instructions.
  • Rooting will void the warranty of your phone.

Requirements


  • Backup all your Phone Data. Read our guide on how to take a complete backup of Android Gadgets.
  • Enable USB debugging on your phone by going to "Settings > Applications > Development > USB debugging". Make sure the USB Debugging option is ticked. 
  • At-least 70% of Battery juice (charge !) remaining.

Step by Step Instructions


  • First you need to Download the HTC One X drivers from HERE and save it to a folder in your PC.
  • Download the "root.zip" file from HERE
  • Extract the above "root.zip" file using any other decompressing software to your PC.
  • Now connect your AT&T HTC One X to your PC via a USB Cable. 
  • Then follow the below step according to your OS environment.

  1. Double click on root.bat if you are on windows
  2. Run root-linux.sh if you are on linux 
  3. Run root-mac.sh if you are on mac


Please Note that, your phone will automatically reboot a few times. Wait until the process is complete.

Good-Luck !

Monday 18 June 2012

How to make Complete Back-up of Data for Android Gadgets

How to Backup Data of Android Phones


At times, we, the Android lovers feel the requirement of a complete Back-up of all Data on our Gadget; may it be because some of us love to try different updates and custom ROMs or MODs or rather it is better to be cautious of the valuable Data stored that might be accidentally wiped out because, the phone might get into water by-chance or might slip-off the hands and become wrecked. Whatever the reason is, a good Back-up technique is worth discussing. Today I'll share some of the sophisticated procedures of making a good backup of your Android Phone Data.

Techniques for Rooted Gadgets


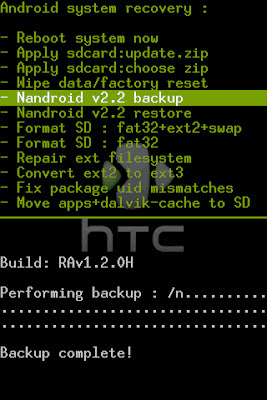
  • Nandroid Backup


Nandroid backup
Usually if you root your gadget, most likely you do have a custom Recovery option. Most of the custom recovery options provide good backup as-well. However, the most popular custom recovery is ClockWorkMod Recovery. Using ClockWorkMod recovery it is very easy to make a backup of all your Data to the SD card inserted in the device.

All you need is to boot into Recovery Mode and create a Nandroid backup (usually through the "menu Backup and restore --> Backup").

You can also copy the entire Nandroid backup to your computer. It ensures added security because you might accidentally delete the Nandroid backup folder from the SD card.

If you want to restore from that backup you made at some point later, just copy the Nandroid folder back onto your SD Card, boot into Recovery Mode and select "Backup and restore --> Restore".


  • Titanium Backup

Titanium backup
Another powerful backup option is to use Titanium Backup App. Titanium Backup gives you direct access to your system. 

Once you have launched the app, click on the "Backup/Restore" tab and click the Menu button on your phone. From the menu that appears, select "Batch". At the next menu, click RUN Backup all user apps + system data. You can choose to backup just your user apps and system data but you can choose a complete and total backup of your phone.

Depending upon your volume of data, the back-up procedure can take from a few minutes to half an hour or even more.

It is recommended that you copy the back-up to your PC. In the SD card /Titanium backup directory you can find your backup.


To restore your backup, you can just select "Menu --> Batch". On the "Backup/Restore" menu, scroll down to find restore options.


Titanium Backup can be downloaded free from Google Play Store using This Link.


Techniques for not rooted Gadgets


  • MyBackup Pro


This app not only works on rooted gadgets but also un-rooted gadgets.

MyBackup Pro gives you option to make backup of either your Data or the Apps. Once you have launched the App, from Backup option you will get to select between the two.

In case you've selected Backup your Apps, you will have the flexibility to select some or all of the Apps. 

If you’ve selected data, you can choose to backup your data to either your SD card or to an online server. Just like in the Apps menu, you have the option of selecting certain data you’d like to save or all of them. Your data will be compressed into a ZIP file on your SD card.

You can always play safer by copying the backup zip file to your PC.


MyBackup Pro also have the feature of scheduling which takes backup of your Data in a timely manner.

For restoring your data, simply choose the option Restore from the menu.

MyBackup Pro can be purchased from Google Play Store using This Link. You can also have a taste of this App using 30 day Trial Version.


Techniques to make a Cloud-Backup


So far we have discussed about making a backup and storing it locally. But storing important backup locally might not come handy when you are away. Instead if you store your back-up, contacts or important Data in the Cloud network, then you can access your Data from anywhere round the globe. Is n’t that cool? That makes you independent of any hardware or device to contain your important information/Data. You just need to connect to the internet from somewhere and you can get your Data anytime.

There are several Cloud Networks to store your back-up. Here I’ll mention only the excellent Cloud Servers that syncs your Data easily.


Back-up Data using Google Account


backup data using Google Account


Android, being a Google Product itself lets you easily backup your contacts, system settings, apps, calendar, emails on your Google account. Simply go to Settings --> Privacy on your phone. Check the boxes for “Back up my settings” and “Automatic restore.” Make sure that under Backup account you specify the Google account that you want to backup data for.


Now go to Settings --> Account & Sync, tap on the Google account you want to sync, and check all the available options. This way, your data will be stored in your easy-to-access Google account.


Google Drive


back up data using Google Drive


Google Drive is Google’s cloud service that offers free cloud storage. Google Drive is available for: PC and Mac, Chrome OS, iPhone and iPad (coming soon), Android devices.

Google Drive is available in Google Play Store for your Android Gadgets. Head over to https://drive.google.com/ to get started.

Get started with 5 GB of free space. Upgrade to 25 GB for less than $2.50 a month, and you can store practically everything for next to nothing.


Photo & Video Back-up


Android v2.2 and higher supports Google’s Instant Upload service. You can enable this service through Menu > Settings.

This service uploads your photos and videos that you click or shoot automatically. These are uploaded t your Google + private album and most importantly, they are only visible to you until you decide to share them with friends.

You can also use Picasa Tool, Flickr Companion, PhotoBucket Mobile to store your photos. But these are not automatic service. You need to manually upload your content; also you must have corresponding account to use their service.


SMS Backup+


SMS Backup+ is a cool app that can store your important SMS, MMS, Call Logs. This app sends all your SMS threads to Gmail and stores them under label SMS. When you require to restore, SMS Backup+ allows you to restore your SMS and Call Log entries right into your Android Gadget. MMS cannot be restored though. You can download SMS Backup + from the Google Play Store for free.


Backup Data on Box Cloud server


Box cloud storage


Box offers a cool app for your Android gadget to sync your Data to their cloud network. But first you need to have an account in Box.net. You can get upto 50Gb of free cloud storage. Read this article to understand how to set up Box.net.

Backup Data on Dropbox Cloud server

Dropbox cloud storage

Dropbox is similar Cloud service to that of Box.net. They offer 5 GB of free cloud storage. Also Dropbox offers handy apps for your Android device as well as your PC. Read this article to have a clear idea.


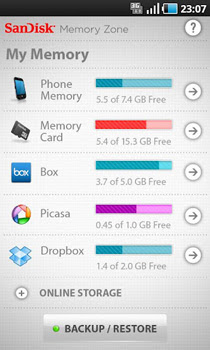
Sandisk Memory Zone


Sandisk Memory Zone


This is a cool app that allows you to backup files and apps from your phone’s SD card to a cloud storage provider (Box, Dropbox, Google Docs, Picasa, SugarSync, and Facebook ).

Once you’ve installed this app, it’ll scan your SD card and your device’s internal memory the first time you run it. You’ll be able to choose a cloud storage provider where you’d like to backup your data. Sandisk Memory Zone will prompt you for the frequency schedule of your backup, whether you’d like it to be backed up “only this time” or “everyday.”

Sandisk Memory Zone can be downloaded free from the Google Play Store.


inDefend Mobile Backup


inDefend Mobile backup

With inDefend Mobile backup you can easily sync your contacts, call logs, text messages your calendar, personalized settings to the Cloud Network provided by inDefend. But you should have an account on inDefend.

You may also chose certain data to restore within a backup package. The inDefend Mobile Backup also has the flexibility to schedule your backups, automatic storing of your mobile data in the cloud. You can also enable or disable the auto-backup feature. You can set the frequency for making backups automatically, in days, week, or months. You can also enable or disable sending of notification alerts to your email under the Settings tab.

Once the App is running, you need to log into your account, then you will be directed to the app’s home screen. Here you can check the boxes of the contents you want to backup.


inDefend Mobile backup settings


After you have made your choices, press the Go button at the bottom of the screen to begin encrypting your data. The app keeps you updated with the uploading progress via the phone’s notification menu. You will also need to label your backup package. The app allows you to upload 10 different backup packages.Under the Backups tab, inDefend Mobile Backup will let you see all your backup packages.

To restore a specific mobile content from within a package, choose the backup package and select the specific data you want to restore on your phone. The app will then download and decrypt it, and restore the data on your Android device.


You can download inDefend Mobile Backup for free from the Google Play Store.


Manual Backup – Drag & Drop


You are the Boss of your Android Gadget and you can always connect your device to your computer and access your device’s SD card. You can copy, drag & drop your content to a folder on your PC and save it.


If you are systematic and organised, Manual Backup is the safest in my point of view. But there’s always an advantage using the automatic schedulers offered by the Android Apps that we discussed so far. I guess after reading this article you would be a lot more cautious about your important Data. Also this guide might come handy to save some memory space on your Gadget, is n’t it?